

Building a Simple Inventory Application for Your Furniture Workshop
Keeping track of parts, raw materials, and finished products is critical for any small to mid-sized furniture shop. Without a clear view of what’s in stock, you risk running out of plywood sheets on a busy day, overordering hardware you don’t need, or losing time searching for components. The good news is that you don’t need a huge software budget or months of development to get started. In this article, I’ll show you how to build a lightweight, user-friendly inventory application tailored for a furniture workshop—one that you can customize and expand as your business grows. You can also explore a working example of my own inventory app at [example-app-link.com] (replace with your actual link).
Why a Custom Inventory App Matters
Many small workshops rely on spreadsheets (Excel, Google Sheets) or paper-based logs to track inventory. While these methods can work initially, they quickly become cumbersome as order volumes increase, SKU counts grow, and multiple team members need access. A simple web or desktop app can provide:
- Real-time stock levels: See your current quantities of lumber, fasteners, hardware, and upholstery supplies in one place.
- Automated alerts: Set minimum thresholds (e.g., “Notify me when oak boards fall below 20 pieces”), so you can reorder before you run out in the middle of a project.
- Multi-user access: Allow carpenters, managers, and purchasers to check inventory from their tablets or workstations, avoiding duplicate orders or unnecessary searches.
- Basic reporting: Generate weekly or monthly reports on which materials moved fastest, which items sat on the shelf, and where you might be able to reduce waste.
Even a small margin improvement—say, avoiding one or two emergency rush orders per month—can more than pay for the time you invest up front in building a simple inventory tool.
Core Features of a Minimal Viable Inventory App
Below is a breakdown of the essential functions your inventory app should include. You can start with this feature set and then layer on additional modules (e.g., purchase ordering, barcode scanning) over time.
- Item Master List
- Item Name / SKU: Unique code or name for each component (e.g., “PLY-OAK-4×8” for a standard oak plywood sheet).
- Category: Lumber, Hardware, Finish, Upholstery, etc.
- Unit of Measure: Piece, sheet, foot, box.
- Reorder Threshold: Minimum quantity before alerting for reorder.
- Stock In / Stock Out Transactions
- Date: Auto-timestamp.
- Quantity Added or Removed: E.g., +10 (received), –2 (used).
- Location: If you have more than one storage area (e.g., “Main Warehouse,” “Shop Floor”).
- Notes: Optional field to record why stock was consumed (e.g., “Project #123 – Dining Table”).
- Real-Time Dashboard
- Current Quantity: Automatically calculated by summing all stock-in and stock-out entries for each SKU.
- Low-Stock Indicator: Highlights items at or below the reorder threshold in red.
- Search / Filter: Quick search by SKU, category, or keyword.
- Reporting & Alerts
- Low-Stock Report: A simple table that lists all items currently below the reorder threshold.
- Monthly Usage Report: Summarizes how many units of each SKU were used in the past month.
- Email or SMS Notification (optional): Send a daily “Low-Stock Alert” to the workshop manager.
Technology Options (From Zero to Prototype in a Day)
Depending on your comfort level with coding, you can choose from several different technology stacks to build your app:
- No-Code / Low-Code Platforms
- Airtable: Create a base with tables for “Items” and “Transactions.” Use Airtable’s built-in “Automations” to send email alerts when quantity ≤ threshold. Pros: Lightning fast to set up, intuitive interface, free tier for small teams. Cons: Limited customization if your needs become more advanced.
- Glide Apps: Turn a Google Sheet into a mobile/web app. Define columns for SKUs, quantities, and formulas to calculate current stock. Setup automatic email notifications with Zapier. Pros: Mobile-friendly, ideal for teams using tablets on the shop floor. Cons: Free plan includes Glide branding; advanced features require a subscription.
- Spreadsheet + Python (for a bit of coding)
- Google Sheets: Build two sheets—“Items” (columns: SKU, Category, Unit, ReorderThreshold) and “Transactions” (Date, SKU, Delta, Location, Notes).
- Google Apps Script (JavaScript): Write a simple script that, on edit or daily time-driven trigger, checks for low-stock items and sends an email.
- Flask + SQLite (Lightweight Web App):
- Use Python’s Flask framework (pip install flask) to spin up a minimal web interface.
- Store data in a local SQLite database (pip install sqlite3).
- Flask templates (HTML) can display tables of current stock, forms to add transactions, and buttons to generate reports.
- Pros: Fully customizable, keeps data on premises, easy to extend if you later add authentication or barcode scanning. Cons: Requires basic Python skills and time to configure hosting (even a Raspberry Pi or a small cloud VM works).
- Full-Stack JavaScript (Node.js + React or Vue)
- Backend: Node.js with Express, storing data in MongoDB (or a hosted service like MongoDB Atlas).
- Frontend: React or Vue for a mobile-responsive dashboard.
- Deployment: Host on Heroku (free tier for small apps) or Vercel.
- Pros: Modern, scale-ready, ideal if you eventually want a multi-user, production-grade platform. Cons: Higher learning curve, longer initial development time.
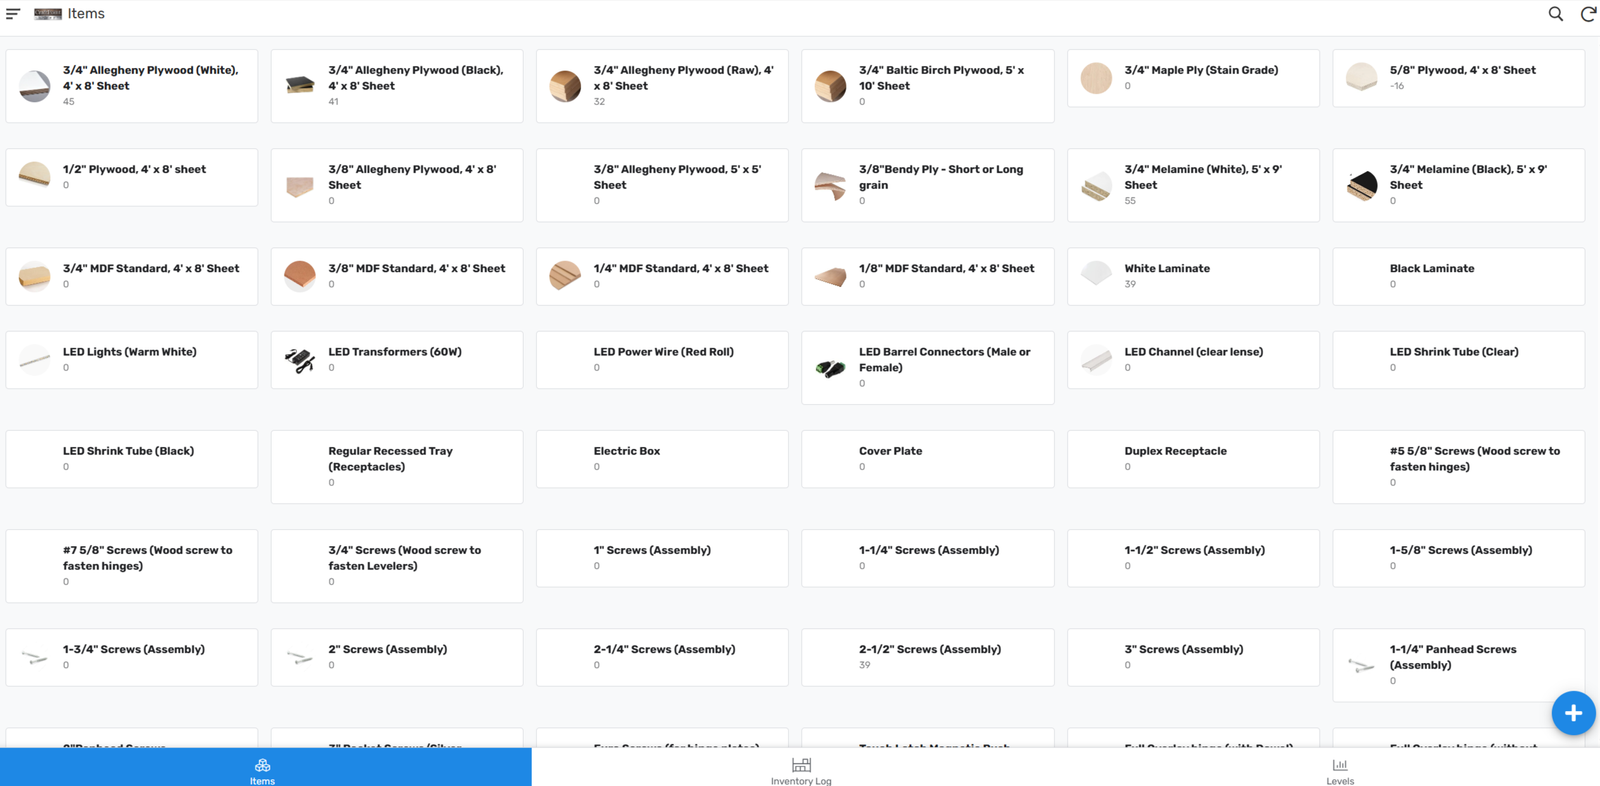
Example: My Own Inventory App (Live Demo)
How I Can Help: Customizing Your Own Inventory App
If you’d like hands-on assistance, here’s what I offer:
- Initial Consultation (Free, 30 Minutes)
- We’ll talk through your current inventory process and pain points.
- I’ll recommend the simplest platform (no-code vs. custom code) based on your team’s comfort level and budget.
- Customized Prototype Setup (Flat Fee)
- I’ll provision a minimal cloud server (e.g., DigitalOcean droplet, ~$5/month) or help you configure it on your local network.
- Install and configure the base Flask + SQLite app (or Airtable/Glide template).
- Import your existing SKU list, set your initial quantities, and configure email notifications.
- Training & Documentation
- A short video walkthrough (10–15 minutes) showing how to add new items, record transactions, and run reports.
- A PDF quick-start guide you can share with staff.
- Ongoing Support (Optional)
- Quarterly check-ins to help you add new features (e.g., barcode scanning, role-based user logins, deeper analytics).
- Debugging or performance tuning if your SKU count grows into the thousands.